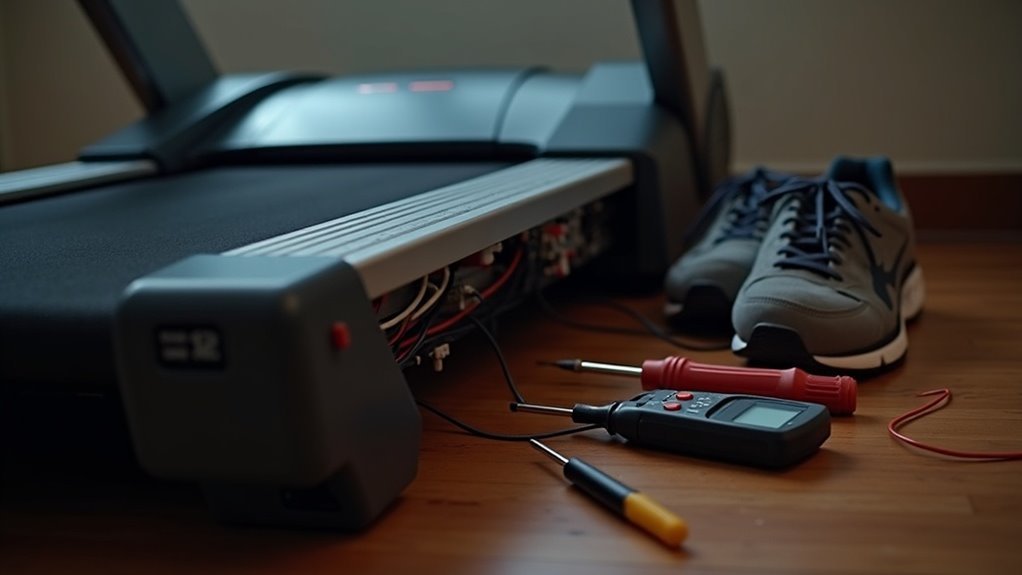
To troubleshoot a treadmill that won’t start, start by ensuring your home gym setup is in good condition. First, test the wall outlet with a voltage tester to confirm it’s providing power. Then, inspect the power cord for any signs of damage, and check the functionality of the on/off switch using a multimeter. Don’t overlook testing the circuit breaker and the safety key to ensure they are working properly. Address any issues you encounter, as this systematic approach will help you effectively diagnose the problem. Additionally, consider checking for any loose connections or consulting the treadmill’s manual for further troubleshooting steps. Staying on top of your equipment maintenance is key to maintaining your home workout routine.
Key Takeaways
- Begin by checking the wall outlet. Use a voltage tester or plug in another device to confirm it has power, ensuring your workout won’t be interrupted.
- Inspect the power cord for any visible damage. Utilize a multimeter to test for continuity, looking for a reading between 0.1 and 0.5 ohms to ensure it’s functioning properly.
- Make sure the on/off switch is flipped to the ON position. You can also test it with a multimeter to verify it shows low resistance, confirming it’s operational.
- Check the safety key and switch. Ensure the key is firmly inserted in its place, and test the switch for continuity when the key is in position to guarantee safety during your workouts.
- Regular maintenance is crucial for your treadmill’s performance. Clean it regularly and lubricate the walking belt to keep it running smoothly and avoid any potential startup issues that could hinder your fitness routine.
Testing the Wall Outlet
To ensure your treadmill is powered and ready for your home workout, begin by testing the wall outlet. Use a voltage tester to check for power flow; in the USA, you should see around 120 volts.
Alternatively, plug in a lamp or another device to verify that the outlet is functioning properly. If you have a multimeter, set it to AC voltage and measure between the hot and neutral slots for an accurate reading.
If the outlet isn’t working, consider resetting the circuit breaker or replacing a blown fuse. Always consult a professional electrician for any electrical issues if you’re unsure about performing these tests yourself.
This will help you kickstart your treadmill repair process and keep your home gym running smoothly.
Testing the Power Cord
After confirming that the wall outlet is working properly, the next step is to inspect the power cord of your treadmill.
Begin by unplugging the power cord and visually checking for any signs of damage, such as cuts or frayed wires.
Utilize a multimeter set to measure resistance; a healthy power cord should show a reading between 0.1 and 0.5 ohms. If plugging in the power cord trips the circuit breaker, this may indicate a potential dead short.
To ensure the cord is carrying electrical current, use a circuit tester; a lack of current could point to internal issues.
Always replace any damaged power cords immediately to ensure your safety and the proper functionality of your home gym equipment.
Staying healthy through exercising at home relies on well-maintained equipment!
Check the On/Off Switch
To troubleshoot your treadmill, start by locating the on/off switch, typically situated near the front base. Ensure it’s set to the ON position.
Next, unplug the treadmill and use a multimeter to check for continuity. If the multimeter doesn’t beep or indicates high resistance, it may be time to replace the switch to get your home gym equipment back in action, helping you stay on track with your fitness goals.
Locate the Switch
Before you can troubleshoot your treadmill effectively, it’s essential to locate the on/off switch, which is typically found near the front at the base of the frame.
Here are some steps to ensure a thorough inspection:
- Make sure the power switch is in the ON position to ensure your workout can commence.
- Conduct a visual inspection of the switch for any signs of damage or sticking, as a functional switch is key for your home gym experience.
- Always unplug the treadmill before testing the switch with a multimeter, ensuring your safety while maintaining your home workout equipment.
Test for Continuity
Testing for continuity in the on/off switch is a vital step in troubleshooting your treadmill, ensuring you can maintain a healthy workout routine at home.
Start by unplugging the treadmill to prioritize safety. Set your multimeter to continuity test mode, then place the probes on the terminals of the on/off switch located near the front base.
A properly functioning switch will either beep or display a low resistance reading, indicating that it’s working effectively. If you don’t hear a beep or notice high resistance, the switch may be faulty and requires replacement.
Testing the Circuit Breaker
When troubleshooting your home gym equipment, especially your treadmill, it’s crucial to check the circuit breaker for any issues that might disrupt its performance.
Follow these steps to test it effectively:
- Unplug the treadmill for safety.
- Use a multimeter set to measure resistance (Ohms) and attach probes to the circuit breaker terminals.
- A reading close to zero indicates proper function; if you see infinity or OL, the circuit breaker may be faulty and needs replacement.
Regularly checking the circuit breaker helps prevent problems related to overloaded circuits, worn-out breakers, and faulty wiring, ensuring your treadmill—and your home workout routine—runs smoothly.
Taking these precautions allows you to stay committed to your fitness goals without interruptions.
Testing the Safety Key and Safety Switch
Ensuring your treadmill operates correctly involves more than just checking the circuit breaker; the safety key and safety switch are crucial components for your home gym setup.
First, confirm that the safety key is securely inserted into the console; if it feels loose or wobbly, it may need to be replaced to ensure your safety while exercising.
Unplug the treadmill and use a multimeter to test the safety switch. When the key is removed, it should read open (no continuity), and when it’s inserted, it should show closed (continuity). This is essential for preventing accidents during your workouts.
Additionally, perform a tug test on the safety key; if it pops out easily, that could indicate a fault with the safety key or switch, and both should be replaced to maintain a secure and safe workout environment.
Inspecting Treadmill Components
Begin your inspection by ensuring that your treadmill is securely plugged into a working wall outlet. This simple step is crucial for confirming the power source is functional.
Next, take a moment to evaluate the safety features, including the safety key and switch, to ensure they’re in good working condition.
These preliminary checks are vital for identifying any potential issues before delving into the more intricate components of your home gym equipment.
Check Power Source
To ensure your treadmill powers on properly and supports your home workout routine, start by inspecting the wall outlet with a voltage tester to confirm it’s delivering around 120 volts, which is crucial for operation.
Then, check the following components:
- Power Cord: Examine for any visible damage and use a multimeter to test for resistance readings between 0.1 and 0.5 ohms to ensure it’s functioning properly.
- Circuit Breaker: Use a multimeter to verify continuity; a reading close to zero indicates that the circuit breaker is working as it should.
- Safety Key: Make sure it’s securely in place, as the treadmill won’t start without it.
Following these steps will help you pinpoint any issues with the power source, keeping your home gym equipment ready for your fitness journey.
Inspect Safety Features
Inspecting the safety features of your treadmill is crucial for ensuring a safe and effective workout at home.
First, check that the safety key is securely inserted; a loose or missing key can prevent the treadmill from operating properly. Conduct a tug test to ensure it stays in place—if it easily pops out, it’s time for a replacement.
Next, evaluate the safety switch by removing the safety key; the treadmill should stop immediately. Use a multimeter to test the switch’s continuity—an open reading when the key is removed and a closed reading when it’s inserted is ideal.
Lastly, inspect the on/off switch to confirm it functions correctly. Remember to unplug your treadmill before performing any tests to ensure your safety.
Common Troubleshooting Steps
When troubleshooting your treadmill at home, the first step is to check the power connection. Ensure it’s plugged directly into a wall outlet, avoiding the use of extension cords for safety.
Next, confirm that the power switch is ON and check if the indicator light is illuminated. If it’s not lighting up, follow these steps:
- Safety Key: Make sure the safety key is securely inserted; a loose key can prevent the treadmill from operating.
- Wall Outlet: Use a voltage tester to confirm that the outlet is working properly.
- Circuit Breaker: Inspect the circuit breaker for any tripped switches and reset them if necessary.
If you still experience power issues, examine the power cord for any visible signs of damage, as this can impact the treadmill’s motor performance.
Staying on top of these checks ensures you can keep your home gym running smoothly and maintain your fitness routine.
Preventive Maintenance Tips
Maintaining your treadmill is crucial for ensuring optimal performance and longevity, especially for those committed to exercising at home. Here are some preventive maintenance tips tailored for your home gym:
- Keep it Clean: Regularly inspect and clean the area around your treadmill to prevent dirt and dust buildup, which can affect its operation and your workout experience.
- Lubricate the Walking Belt: To minimize friction and ensure a smooth workout, lubricate the walking belt as recommended, typically every 3-6 months. This will help prolong the life of your equipment.
- Use a Dedicated Circuit: Always plug your treadmill into a dedicated circuit to provide consistent power. This helps reduce the risk of overload and ensures your machine runs smoothly.
- Check Power Cords and Connections: Regularly inspect power cords and connections for any frays or damage. Addressing these issues early can prevent electrical problems that could disrupt your fitness routine.
- Document Maintenance: Keep a log of any maintenance performed, such as lubrication and inspections. This will help you track the condition of your treadmill and identify any potential issues that may require professional attention.